 ContentPowered.com
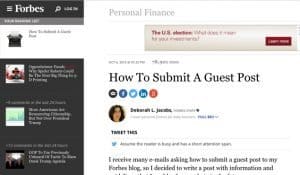
In some ways, your author bio for a guest post is just as important as the post itself. Often, your bio is the commonality between guest posts, the line of similarity between the guest post and your own site, and the one major piece of off-site branding you’re able to control. It’s imperative that you keep it simple and include information that helps you build your personal brand. Plus, in some cases, it’s the only personal link you’re able to include. So what should you include, what should you avoid, and how should you frame it all?
First Up: Learn the Site Format
The first thing you need to do is browse your target site looking for other guest posts from other infrequent contributors. This will inform you what the site format looks like. Every piece of advice I give you is trumped by the site format.
If I recommend 50 words but they give you 100, use 100. If I say put in two links and they only allow one, pick one of them. If I tell you to write in third person but they prefer a more personal first person, write in first person. Always customize your content, both post and bio, for the site that will publish it. When your content is seamless on the target site, it gets more engagement.
If the site has no consistency or if they leave it to yourself, here are the generally most effective elements you should aim for.
Tell Them Who You Are
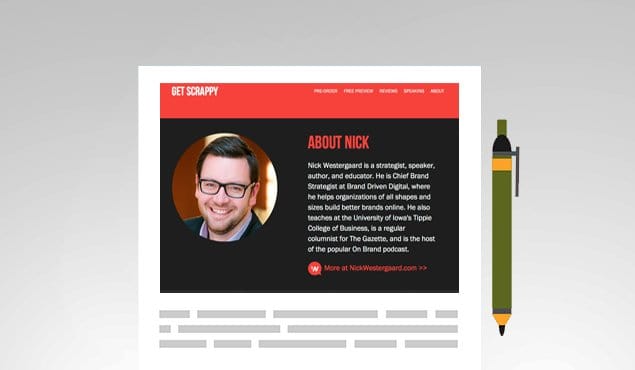
The meat and potatoes of your author bio is the general description of who you are, as a person, as a blogger, and as an authority. Above all else, when reading the below points, remember one thing: your audience generally doesn’t care. You’re going through the motions here, but many users aren’t going to read or skim your bio. The main thing that’s going to stick in their mind is your profile picture, and only once they’ve seen it around. Don’t stress too much about specific wording for everything below.
- Keep the bio short, sweet, and to the point. Generally, a good author bio is only 50 words. This is more than enough to cover quite a bit of detail, and generally works out to be 3-5 sentences depending on length. For example, this bullet point is exactly 52 words long.
- Write your bio in the third person perspective. Think of yourself as an outside journalist compiling a tiny biography for who you are as a person. What are the most salient points about you, relevant to this audience? Include them. I’ll write some examples below.
- Don’t use over-the-top buzzwords. Calling yourself a guru, a ninja, an expert, an influencer, or a wizard is likely to make people roll their eyes. Tell the truth; you’re a blogger, you’re a CEO, you’re a founder, you’re a C-level executive. Don’t try to be too clever or you might fall flat.
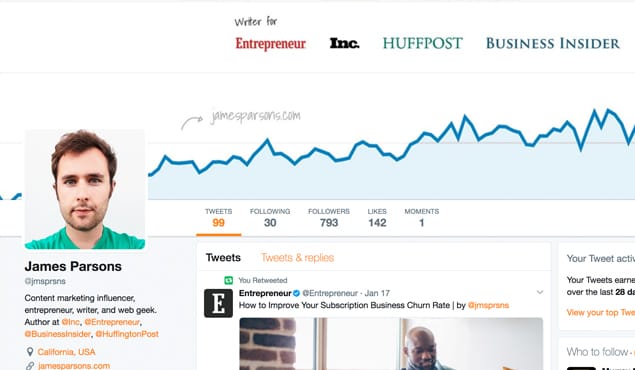
- If possible, include one element of validation for your quality as a source of information. Neil Patel can say he was named the top digital marketing expert by Forbes. You can see this in car commercials as well, citations of awards the cars have won and for how many years running.
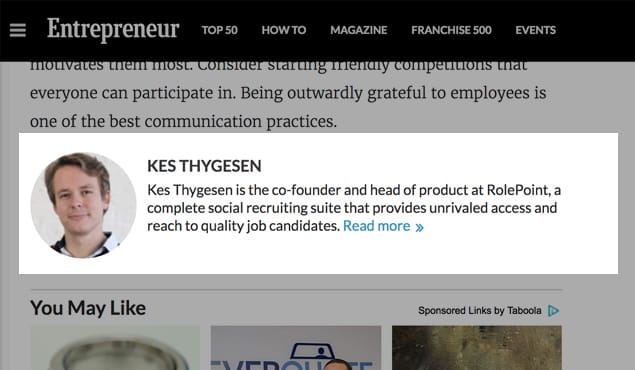
- Namedrop a couple of big-name publications you’ve written for. Forbes, CNET, VentureBeat, the Huffington Post, and other big name sites are good to name drop. However, avoid namedropping a direct competitor to the site you’re publishing on. No namedrop is better than a mediocre namedrop.
- Explain what you do in one sentence, max. Think about it like what you might put on a business card. What do you do? “I’m a tech blogger and owner of X company.” It doesn’t have to be elaborate or astounding, it just has to be there.
- Try to include one quirky personal detail. What do you like to do in your free time? It can be as simple as “coffee lover” or “who likes to hit the gun range on days off.” Don’t get too weird, don’t talk about your career as a furry cosplayer or whatever. Unless, of course, your audience is into that.
- Include a call to action for something social. Twitter is the commonly accepted profile to link, but you can send people to a Facebook page, a personal website, a LinkedIn profile, or even an email address. More on this in a later section.
- Avoid using the word “freelance” to describe yourself. There’s a certain negative stigma attached to the phrase these days, likely due to the engrained culture of corporate and business loyalty brands want to foster. It’s best to simply leave it out. Hubspot talks about this more in their post here.
Examples of salient points you might want to include:
- Frodo is a hobbit, an adventurer and bearer of the One Ring of power.
- Shepard is commander of the Normandy and member of the Spectres.
- Elon is the founder of Tesla, SpaceX, and other innovative tech ventures.
The point is to include relevance of who you are and why you’re important to the people reading the guest post. If you’re on a tech blog, focus on tech aspects of your career. If you’re on a freelancer blog, focus on your success as a freelancer. If you’re on a DIY blog, focus on things you’ve created.
Keep in mind that the users who read your bio are doing so because they want to know why they should trust what you have to say. It all needs to sound good and impressive, without being obviously fake or filler content.
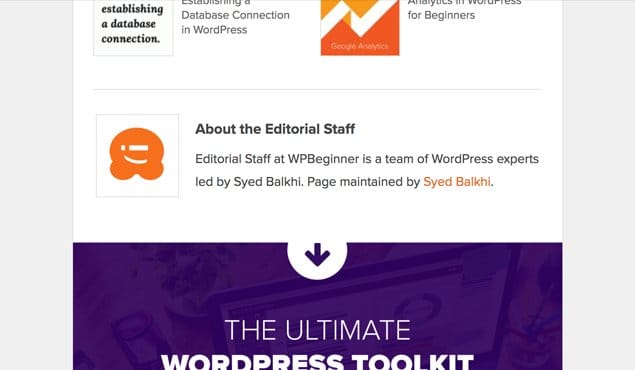
Including a Valuable Link
Generally, you want to have two links in your author bio. One of those links will be to a valuable web page for you, and the other will be a social link of some kind. The second one I’ll discuss in the next section, but for now let’s talk about the primary web link.
You have a couple of options for this link. You can link it to your website as a whole, as part of the “I’m a person who is the owner of X” phrasing in your bio. It’s simple enough for Neil Patel to say he’s the co-founder of Crazy Egg and link to their homepage, and it’s good to go.
There are two quirks with that scenario, though. First of all, Neil Patel has founded more than just Crazy Egg. He could link to Crazy Egg, KISSMetrics, ACS, or his personal site. He could talk about investments he’s made in Mimico, Estately, or Adzerk. He could even link to his profiles on Forbes or another site he writes for. He has to decide which of his many businesses he wants to link to.
Secondly, I will generally recommend that you link to a sub-page or blog post rather than a homepage, but linking directly to Crazy Egg doesn’t do that. So why does it work?
Well, the reason you might want to link to a blog post or a sub-page is for the value it brings to the table. If I’m Kevan Lee, I would link to a post like this in a sentence that says something like “Author of the go-to guide for social media timing.” That gives the user immediate value and a call to action to click it implied in the fact that it’s a recognized go-to authority on the topic. It’s authoritative for the author and it’s value for the reader.
Neil Patel might not need to do that with Crazy Egg because the page itself is designed as a big value proposition for the Crazy Egg service. He might still be able to benefit from sending people to the blog itself, but it really would deserve testing. Do more people want to read a blog post and convert from there, or are more people likely to investigate based on the name or description of the service and be sold by the homepage? That’s for you to find out.
I generally prefer the blog post method, for two reasons. First, many of my brands and services are less likely to convert on a cold call like that. Secondly, I put a lot of work and pride into my blog posts, and consider them to be packed with value, so I like to put my best foot forward. Besides, people just finished reading a blog post as a guest post; it stands to reason they’d be more interested in further reading than in a conversion to something potentially only barely related.
Choosing a Social Network Profile
Most author bios end on a social media link. The final sentence of the bio is something like “To catch him live, check out @username on Twitter.” A social link is excellent to have, both for networking and for building a personal brand presence. The only question is, what social network do you choose?
In general, I recommend Twitter, because it’s the easiest for people to follow and engage with. Facebook comes in second, and only if you don’t really use Twitter but are moderately invested in Facebook. Only share Facebook if you have a personal brand Page, rather than a personal profile, and don’t share a business page.
Other social networks can work but only in context with the site you’re posting on and your niche. If you’re primarily a job and interview brand, something like Resumes to Interviews, you might want to share a LinkedIn profile instead. If you’re a primarily graphical brand using photography or art, a Tumblr or Instagram account can be much more beneficial.
Unlike many other social recommendation lists, I won’t recommend Pinterest or Reddit here. Pinterest isn’t great because it’s not really personal. Pinboards are pretty impersonal to begin with, and while people can follow you as a user, they don’t get much actual networking out of it. If your brand is heavily focused on Pinterest that may be an exception, but you’ll know if that’s the case. As for Reddit, the site doesn’t have much user-to-user networking, and it’s pretty unlikely that you have an entire subreddit dedicated to your own personal brand, so you aren’t getting value linking to a Reddit profile.
If the site you’re guest posting on limits you to one link in your author bio, you will have to choose whether you want your web link or your social link. Generally, I go with the social link, unless you don’t have a strong personal brand to build.
Pick a Pic
One of the things I mentioned up above is that many people simply won’t be reading your bio. They’ll glance at it, maybe see the anchor text of the link you provide, but the main thing they’ll see is your profile picture. When building a personal brand, your face is just as important as a logo. It IS your logo. It’s why this image of Neil Patel shows up everywhere on his sites, and why you can instantly recognize him when he creates a new post. He’s built a specific brand and attached his face to it, and now that face is synonymous with insider value. The same can be said of Jon Loomer, whose website has his face absolutely everywhere.
You need to pick a picture – have one professionally taken – and make sure it meets all the hallmarks of a good profile picture. A headshot, probably not head-on, looking casual, smiling. Avoid a stern look and avoid looking like a mug shot. Make sure it looks good both in black and white and in color.
As an added note, you should make sure this profile picture is your Gravatar. Many blogs simply link to a Gravatar profile when they create an author bio and will use the image that comes up with it. This has two benefits; first, you don’t need to attach an image file to every guest post you send. Second, if you change your Gravatar, it changes your picture on most of your guest posts out there. It’s easy to set up and gets your branding going big time.

Thank you for sharing such a helpful information. But i want to know if i use one bio for different topics on one guest blogging website than it is good or should i update my bio after some time?